
Why Is My Bread So Dense? Baking Mistakes to Avoid 2026

Why is my bread so dense is one of the most common questions home bakers ask after pulling a heavy, tight loaf out of the oven. Dense bread almost always comes down to a gas or structure problem somewhere in the process.
It could be weak yeast, under-kneaded dough, too much flour, poor proofing, or a cold oven that never gave the loaf a proper rise.
The good news is that dense bread is one of the easiest baking problems to fix once you know where to look.
What Causes Dense Bread
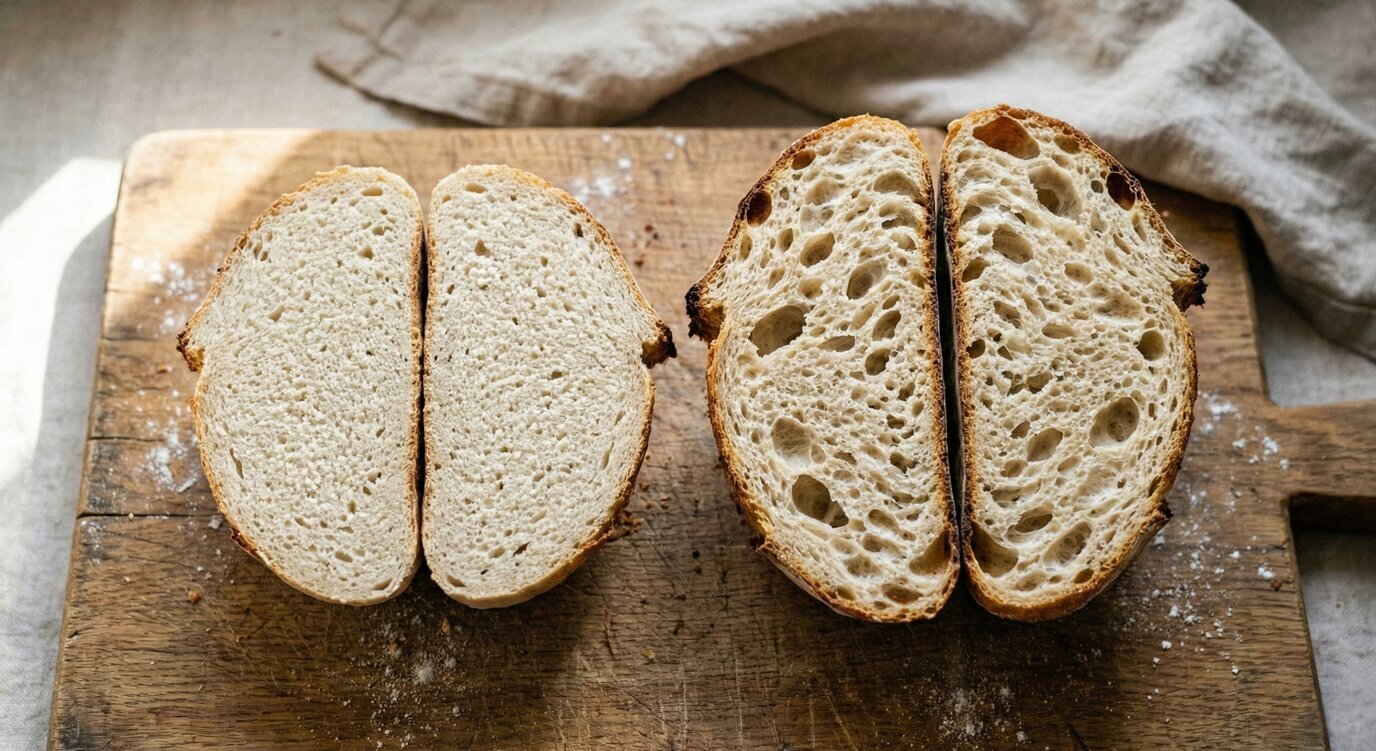
Dense bread happens when dough fails to trap or produce enough gas during fermentation and baking.
Yeast creates carbon dioxide gas as it feeds on sugars in the dough. Gluten strands trap that gas so the dough can expand.
If either part of this system fails, the crumb stays tight, heavy, and compact instead of light and airy.
Almost every dense loaf can be traced back to one of a handful of common mistakes.
Common Causes At A Glance
| Cause | What Happens | Quick Fix |
|---|---|---|
| Weak or expired yeast | Not enough gas produced | Test yeast, use fresh packets |
| Under-kneading | Weak gluten, can’t trap gas | Knead until windowpane test passes |
| Over-kneading | Gluten breaks down | Reduce mixing time, check dough feel |
| Too much flour | Dry, tight dough | Weigh flour, don’t over-add during shaping |
| Under-proofing | Not enough rise time | Use poke test before baking |
| Over-proofing | Dough collapses, loses structure | Watch dough size, don’t over-rest |
| Low hydration | Dry dense crumb | Add water a tablespoon at a time |
| Cold oven or weak steam | Poor oven spring | Preheat fully, add steam early |
| Too many mix-ins | Weighed down crumb | Reduce nuts, seeds, dried fruit |
| Slicing too early | Trapped moisture, gummy texture | Cool completely before cutting |
Weak Or Expired Yeast
Yeast is the engine that produces gas in your dough. If it is old or improperly stored, it will not activate properly.
Expired yeast simply cannot create enough carbon dioxide to lift the dough, no matter how long you wait.
Test your yeast by mixing it with warm water and a pinch of sugar. It should foam within 10 minutes.
Store yeast in an airtight container in the fridge or freezer to keep it active for longer.
Under-Kneading The Dough
Kneading develops the gluten network that traps gas bubbles inside the dough. Skipping this step leaves the structure too weak.
Under-kneaded dough often looks fine on the outside but bakes into a dense, tight crumb on the inside.
Use the windowpane test to check readiness. Stretch a small piece of dough until it becomes thin and translucent without tearing.
If the dough tears immediately, it needs more kneading before it goes into its first rise.
Over-Kneading The Dough
While rare with hand kneading, using a stand mixer for too long can also weaken the gluten structure.
Overworked dough loses elasticity and can no longer hold gas efficiently, leading to a dense final loaf.
Watch the dough closely during mixing and stop as soon as it passes the windowpane test.
Folding techniques are generally gentler and less likely to cause over-kneading compared to continuous machine mixing.
Using Too Much Flour
Adding too much flour is one of the most common dense bread mistakes, especially when measuring by volume instead of weight.
A packed cup of flour can weigh significantly more than a loosely scooped cup, throwing off the entire recipe.
Use a digital kitchen scale whenever possible for consistent, accurate results every time you bake.
Avoid adding excessive extra flour while shaping the dough, as this can quietly increase dryness and density.
Under-Proofing The Dough
Under-proofing is the single most common reason for dense bread among home bakers.
A rushed final rise means the yeast has not produced enough gas, leaving the crumb tight and compact.
Use the poke test to check proofing. Press the dough gently with a wet finger.
If the indentation springs back slowly and leaves a slight dent, your dough is ready to bake.
Over-Proofing The Dough
Over-proofed dough looks puffy and fragile but can collapse in the oven, resulting in a dense, gummy crumb.
The gluten structure becomes overstretched and simply cannot support further expansion during baking.
Watch your dough closely rather than relying only on the clock, since proofing time varies by temperature.
If the dough deflates when touched, it has likely gone past its ideal proofing window.
Low Hydration Dough
Hydration refers to the ratio of water to flour in your dough. Too little water creates a dry, dense loaf.
Underhydrated dough struggles to rise properly and often feels stiff and difficult to shape.
Add water gradually, about a tablespoon at a time, followed by a short rest and gentle folding.
Wetting your hands slightly while kneading can also add just enough moisture without overcorrecting.
Weak Oven Spring
Oven spring is the rapid rise that happens during the first 10 to 15 minutes of baking.
A cold or under-preheated oven fails to create the burst of heat needed for proper expansion.
Preheat your oven fully, ideally for at least 20 to 30 minutes before baking, especially with a baking stone.
Adding steam early in the bake also helps delay crust formation, giving the dough more time to expand.
Too Many Mix-Ins
Nuts, seeds, dried fruit, and other add-ins can weigh down the dough and physically cut through gluten strands.
Heavy mix-ins interfere with gas retention, making the final crumb noticeably denser than a plain loaf.
Start with smaller quantities of add-ins and increase gradually as you gain more baking experience.
Folding mix-ins in gently, rather than kneading them in aggressively, also helps preserve structure.
Wrong Flour Type
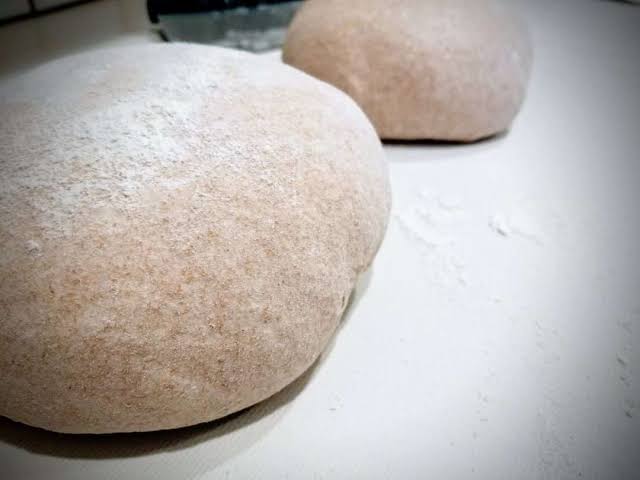
Low-protein flours like all-purpose or cake flour form weaker gluten networks compared to bread flour.
Whole wheat, rye, and spelt flours also develop gluten less easily, often resulting in a denser crumb.
Using bread flour, or adding a tablespoon of vital wheat gluten per few cups of flour, can help.
Blending whole grain flours with white bread flour is a common way to balance texture and rise.
Kitchen Temperature Issues
A kitchen that is too warm can cause yeast to ferment too quickly, leading to a rise and collapse cycle.
A kitchen that is too cold slows fermentation down so much that the dough never develops properly.
Aim for a comfortable room temperature, ideally between 75°F and 80°F, for consistent proofing results.
If your kitchen runs cold, a turned-off oven with the light on can provide gentle warmth for proofing.
Slicing Bread Too Early
Cutting into bread before it has fully cooled traps steam inside, creating a gummy, dense-feeling texture.
Moisture continues to escape from the loaf during the cooling process, which is essential for the final texture.
Let bread cool completely on a wire rack, which usually takes at least one to two hours for larger loaves.
Resisting the temptation to slice a warm loaf is one of the simplest ways to avoid a false “dense” result.
Underbaked Bread
An underbaked loaf will almost always feel dense and slightly gummy, even if every other step was done correctly.
Visual cues like crust color can be misleading, especially with darker flours or enriched doughs.
Use a food thermometer to check internal temperature. Most lean breads are done between 190°F and 210°F.
If in doubt, bake a few extra minutes rather than removing the loaf too early from the oven.
Altitude And Environmental Factors
At higher altitudes, lower air pressure speeds up fermentation and can affect moisture retention in dough.
This can lead to rapid over-proofing or dough that collapses before it reaches the oven.
Reducing yeast slightly, increasing liquid, and shortening proofing times can help balance these effects.
Consulting altitude-specific baking adjustments is especially useful for bakers above 3,000 feet elevation.
Bread Machine Specific Causes
Bread machines are more prone to dense loaves because the machine cannot see or feel the dough like a human baker.
Friction from mixing paddles can overheat the dough, especially in warm kitchens or during summer months.
Using cool liquids and monitoring dough consistency in the first few minutes of the cycle can help.
Many bakers use the dough cycle only, then shape and bake the loaf in a conventional oven for better oven spring.
Troubleshooting By Symptom
| Symptom | Likely Cause |
|---|---|
| Dense center, fine edges | Under-proofing |
| Collapsed or flat top | Over-proofing |
| Gummy, wet crumb | Underbaking or slicing too early |
| Tight, small holes throughout | Weak gluten development |
| Heavy, brick-like texture | Low hydration or too much flour |
| Dense bottom layer only | Poor oven heat distribution |
Step By Step Fixes For Your Next Bake
Start by weighing your ingredients instead of using measuring cups for more consistent results.
Test your yeast before mixing to confirm it is still active and capable of producing gas.
Knead until the dough passes the windowpane test, then monitor proofing visually rather than by the clock alone.
Preheat your oven thoroughly and consider adding steam during the first few minutes of baking.
Tips For Whole Wheat And Enriched Breads
Whole wheat bread is naturally denser due to bran particles that cut through gluten strands as they develop.
Combining whole wheat flour with white bread flour often produces a lighter texture while keeping some whole grain flavor.
Enriched doughs with butter, eggs, or sugar also ferment more slowly and may need longer proofing times.
Patience with enriched doughs usually pays off with a noticeably softer, less dense final crumb.
Tips For Sourdough Bakers

Sourdough relies on a healthy, active starter rather than commercial yeast to produce fermentation gas.
A sluggish or underfed starter is one of the most common reasons sourdough turns out dense.
Feed your starter regularly and use it near its peak activity, when it has visibly doubled and looks bubbly.
Using too much discard or unfed starter in a recipe can also weaken gluten and lead to a denser loaf.
Preventing Dense Bread Next Time
Consistency comes from understanding each stage of the bread-making process rather than following a recipe blindly.
Keeping a simple baking journal with notes on hydration, proofing time, and oven temperature can help identify patterns.
Small, deliberate adjustments over several bakes are usually more effective than changing everything at once.
With practice, most home bakers can consistently avoid dense loaves within just a few attempts.
Understanding Gluten Development
Gluten is formed when the proteins glutenin and gliadin combine with water and are worked through kneading or folding.
This elastic network acts like a web of tiny balloons, stretching to hold the gas produced by yeast.
Without enough gluten development, dough simply cannot expand properly, no matter how active the yeast is.
This is why kneading technique matters just as much as ingredient quality when troubleshooting dense bread.
The Role Of Sugar And Salt
Sugar feeds the yeast and speeds up fermentation, but too much can actually slow yeast activity through osmotic stress.
Salt strengthens gluten and controls fermentation speed, but excessive salt can inhibit yeast and lead to a denser loaf.
Following recipe measurements closely for both sugar and salt helps keep fermentation on track.
Small deviations may seem harmless but can noticeably affect how much gas your dough produces.
Common Measuring Mistakes
Scooping flour directly from the bag with a measuring cup often packs in extra flour without realizing it.
Spooning flour into a measuring cup and leveling it off gives a more accurate, lighter measurement.
A digital scale removes this guesswork entirely and is considered a standard tool among serious bread bakers.
Weighing both flour and water ensures your hydration percentage stays consistent from bake to bake.
How Shaping Technique Affects Density
Rough or overly aggressive shaping can knock too much gas out of the dough before it goes into the oven.
Gentle shaping that preserves some of the gas bubbles helps maintain a lighter, more open crumb structure.
Building surface tension during shaping also helps the loaf hold its structure during the final proof and bake.
Practicing shaping technique over several bakes often leads to noticeably better texture, even with the same recipe.
The Importance Of Steam During Baking
Steam in the first few minutes of baking keeps the crust soft longer, allowing the dough to expand fully.
Without steam, the crust can set too quickly, trapping the dough before it reaches its full oven spring.
Home bakers often add steam using a pan of hot water, ice cubes, or a covered Dutch oven.
This simple step can make a noticeable difference in crumb structure, especially for lean, crusty loaves.
Ingredient Freshness Beyond Yeast
While yeast freshness gets the most attention, old flour can also lose some of its baking performance over time.
Flour stored improperly can absorb moisture or odors, subtly affecting hydration and fermentation.
Store flour in an airtight container in a cool, dry place to preserve its baking quality.
Using fresh, properly stored ingredients across the board reduces the number of variables you need to troubleshoot.
When Dense Bread Is Intentional
Not all dense bread is a mistake. Some traditional recipes, like rye bread or certain rustic loaves, are meant to be denser.
These recipes often use lower-protein flours or shorter fermentation times by design, not by error.
Understanding the intended texture of a recipe helps you judge whether density is actually a problem to fix.
If a recipe is meant to be light and fluffy but turns out dense, that is when troubleshooting becomes necessary.
Building A Consistent Baking Routine
Baking at the same time of day, in the same kitchen conditions, helps you notice patterns more easily over time.
Keeping notes on flour brand, hydration percentage, proofing time, and oven temperature builds a useful personal reference.
Over several bakes, these notes often reveal a single recurring factor behind repeated dense loaves.
This kind of small, consistent record keeping turns troubleshooting into a much faster and more reliable process.
Quick Recap Before You Bake Again
Dense bread almost always comes down to gas production, gluten strength, or oven heat somewhere in the process.
Weak yeast, under-kneading, too much flour, and under-proofing are the most frequent causes home bakers encounter.
Weighing ingredients, testing yeast, using the poke and windowpane tests, and preheating fully address most of these issues at once.
Keeping these checks in mind before your next bake can save you from another disappointing, heavy loaf.
Frequently Asked Questions (FAQs)
1. Why is my bread so dense even after rising?
The dough may have looked risen but was actually under-proofed internally. Use the poke test before baking to confirm readiness.
2. Can too much kneading make bread dense?
Yes, over-kneading with a stand mixer can weaken gluten. Stop as soon as the dough passes the windowpane test.
3. Does old yeast cause dense bread?
Yes, expired yeast cannot produce enough gas to rise the dough properly. Always test yeast before using it.
4. Is dense bread safe to eat?
Yes, dense bread is safe to eat as long as it is fully baked. It is simply a texture issue, not a safety issue.
5. Why is my whole wheat bread denser than white bread?
Whole wheat flour contains bran that cuts through gluten strands. Blending it with bread flour helps lighten the texture.
6. How do I know if my dough is under-proofed?
Under-proofed dough springs back quickly when poked. It should leave a slight indent that fills back in slowly.
7. Can too much water make bread dense?
Excess water usually causes spreading rather than density, but very wet dough can also underdevelop structure if not handled properly.
8. Why does my bread machine bread turn out dense?
Bread machines can’t sense dough texture like a human baker. Monitor the first few minutes of mixing and adjust liquid as needed.
9. Does altitude affect bread density?
Yes, higher altitudes speed up fermentation and can cause dough to over-proof or collapse. Adjust yeast and proofing time accordingly.
10. Why is my sourdough bread always dense?
This usually points to a weak or underfed starter. Feed it regularly and use it when it is active and bubbly.
Final Thoughts On Texture And Practice
Every baker, from beginner to expert, has pulled a dense loaf out of the oven at some point in their journey.
The difference between consistent results and repeated frustration usually comes down to careful observation, not luck.
Paying attention to dough feel, proofing signs, and oven behavior builds an intuitive sense that recipes alone cannot teach.
Over time, this hands-on experience becomes far more valuable than any single tip or trick.
Conclusion
Dense bread is one of the most common frustrations for home bakers, but it is almost always traceable to a specific, fixable cause.
Weak yeast, under-kneaded dough, inaccurate flour measurements, poor proofing, and a cold oven are the most frequent culprits behind a heavy, tight crumb.
By weighing ingredients, testing yeast freshness, using the windowpane and poke tests, and preheating your oven thoroughly, you can address most density issues before they even reach the oven.
Whole wheat, enriched, and sourdough breads each come with their own unique considerations, but the underlying principles of gas production and gluten structure remain the same.
With a little patience, careful observation, and small adjustments from bake to bake, consistently light and airy bread is well within reach for any home baker in 2026.